loading

Pixo Image Editor

Our brand new Editing API is now available

We’re really happy to announce the official release of our most wanted and long awaited Editing API! It is available right now!

You can check our Editing API docs and see what can be done via this API. Basically it allows you to programmatically manipulate Pixo Editor and the image. You can define settings in each Feature’s Property Panel; or you can manipulate the image, by inserting stickers, text, or applying a filter, shape or frame.

The magic happens thanks to the new exec method of Pixo.Bridge.

You can check the API docs, or you may have a look at this example in order to see the new Editing API in action. In the example you will see Pixo Editor with hidden internal controls (Actions Menu, Edit Menu, Property Panel); instead, the end user is able to draw on the image and crop it from external controls that live in your application!

The Editing API is something that will be constantly extended with new cool API commands. Stay tuned for updates!

Pixo will not support Internet Explorer anymore

Although Internet Explorer browser is no longer supported by the majority of the web, we took the hard decision to continue supporting it, because we had few users on it. But for the past 3 months our stats show zero traffic from Internet Explorer, and although Microsoft will officially say goodbye to IE on August 17, 2021, we think that we are safe to drop Internet Explorer support right now.

Effective from May 1, Pixo Editor will no longer support Internet Explorer. 

Will this affect you

This will not affect you by any reason, because according to our statistics Pixo has zero traffic from Internet Explorer from the past 3 months.

What’s next

We will start removing IE-compatibility code from Pixo’s codebase step by step. As a result, Pixo Editor will become faster & more performant.

Happy browsing!

Create templates and apply them to users’ images

Pixo supports templates for quite some time. But we were getting so many support questions how do they work and how they can be used. Therefore, we decided to make this quick tutorial.

Pixo Templates are actually a pre-defined set of actions that will be applied to end users’ images when they open Pixo Editor. In other words, a template may apply a filter, or adjust colors, or add a frame or shape, or insert a sticker. Basically anything that the regular end-user may do. The difference is, the end user does not have to do that. If your Pixo instance is properly configured to use a template, this template will be applied to the end user’s image when s/he opens Pixo.

How does the template look like

The Template is basically a JSON data. You can export every edited image in Pixo as a JSON:

new Pixo.Bridge({
   apikey: 'apikey',
   onSave: function (image) {
      console.log(image.toJSON());
   },
});

How to create a Template

You will have to configure locally a Pixo instance (which should not be available to your end-users!) and use it to open a placeholder image, make changes, and export it as a JSON.

How to pass this Template JSON to your end users

You should keep this JSON in your database (NB: it may be large!) and serve it via API, or have your server print it as a JavaScript object in the HTML of your pages. Then, you need to pass an object to Pixo’s edit method, containing the following properties:

  • template – that’s the Template JSON
  • src – that’s the end user’s image, which can be url or a dataurl string
const template = { ... };
new Pixo.Bridge({
   apikey: 'apikey',
}).edit({ template, src: 'https://via.placeholder.com/320x240.jpg' });

How does it work

When the template and the user’s image are opened in Pixo, the placeholder image in the template gets replaced with the end user’s image, and all changes are smartly replicated to the user’s image, taking into consideration dimensions and aspect ratio.

Demo

For the demo, we are using the localStorage to save the template (no back-end) for simplicity. There are two instances of Pixo:

  1. Template Creator (open in JSFiddle) – this instance should be locally instantiated on your dev environment and should be used for creating & saving templates
  2. Template Consumer (open in JSFiddle) – this is the official instance for your end user, which consumes the templates created by the Creator

If you still have questions…

…then do not hesitate to post a comment here or contact us via our Contact Form.

Happy coding!

Integrating Pixo Editor into WordPress front-end

We are happy to announce that a new version of the WordPress plugin is now available, which makes it possible to integrate Pixo into the front-end of any WordPress website! This is possible thanks to our new attachToFileInput API.

How it works

Version 2.0 of the WordPress plugin adds settings page to configure Pixo for the front-end. There is a checkbox which makes Pixo globally available and attached to any <input type="file" /> field.

There is also a textfield which allows the website owner to specify the CSS selector that matches specific file input field(s).

When Pixo is attached to a file input, it will open the moment the end user selects an image from the file input. The end user can then edit the image with Pixo, and save it. The save will update the file input, and then the edited version of the image can be submitted via HTML form or JavaScript. This makes it possible to observe any file input, generated on the front-end page by any WordPress plugin!

If the website owner wants to integrate Pixo to specific page or a post, then the global setting should be turned off. The new version of the WordPress plugin comes with a handy shortcode for this purpose:

  • To attach Pixo to a file input field in a post or a page, add the following shortcode:
  • By default, Pixo will attach to every file input (input[type=file]). To attach to a specific field, add the following shortcode:
  • By default, when the user saves the image, Pixo will update the file input. If you want your site visitors to be able also to download the edited image, add the following shortcode:
  • By default, Pixo will load it’s stock stickers collection. If you want to use your own stickers collections, create few, and add the following shortcode:
     where 111, 121 and 131 are the IDs of the collections

Custom Stickers collections

Speaking of stickers, the new WordPress plugin adds a custom post type for Stickers Collections. The WordPress site owner can create custom collections of stickers, which can be included to the front-end instances of Pixo Editor. Then the end users can add these stickers to their images.

Rich set of configuration options

The front-end integration settings page allows the website owner to configure Pixo, providing user interfaces for setting most of the Pixo configuration options:

  • select a Theme
  • choose which Pixo features to include
  • override colors & backgrounds
  • link to custom logo
  • language

More options to come soon!

New configuration options will be added soon, such as configuring custom crop sizes, frames, and any other configuration option that Pixo Editor provides. Stay tuned!

More translations and API updates

We are excited to reveal our new cool APIs to you!

More languages

Before that, we want to let you know that we added few new translations of Pixo Editor:

  • es-ES (Spanish, Spain)
  • ar-SA (Arabic, Saudi Arabia)
  • bg-BG (Bulgarian, Bulgaria)

To translate Pixo into one of these:

const pixo = new Pixo.Bridge({
   apikey   : 'apikey',
   language : 'bg-BG',
});

See all available languages.

We will be very thankful if you help us translate Pixo into more languages! Find out how.

API updates

Attaching to a <input type="file" /> element

One of the coolest new APIs is the ability to attach to a <input type="file" /> element and observe it. When the end user selects image from his file system, Pixo Editor opens. When the user saves the image, the file input gets updated with the edited image, and it can be submitted via standard HTML form or via JavaScript.

To attach to a file input:

<input type="file" name="image" />
<script src="https://pixoeditor.com/editor/scripts/bridge.m.js"></script>
<script>
   //create new Pixo instance
   const pixo = new Pixo.Bridge({
      apikey: 'abc123xyz000',
   });
   //the editor will observe the "onchange" event of the file input,
   //and on save will update it with the new image; then the new image
   //then the new file is ready to be uploaded - no more actions required!
   pixo.attachToFileInput(document.querySelector('input[type=file]'));
</script>

There is also a shortcut. You can pass a DOM reference (or a CSS Selector string) to Pixo constructor options:

<input type="file" name="image" />
<script src="https://pixoeditor.com/editor/scripts/bridge.m.js"></script>
<script>
   //create new Pixo instance
   const pixo = new Pixo.Bridge({
      apikey: 'abc123xyz000',
      fileinput: document.querySelector('input[type=file]'),
   });
</script>

Additional export image data types

We’ve added the following export options in the onSave callback:

new Pixo.Bridge({
   apikey: 'apikey',
   onSave: function (image) {
      image.toBase64();
      image.toJSON();
      image.download();
   },
});
  • toBase64 returns (String) base64 encoded string of the image data
  • toBase64s returns Array of base64 encoded strings of the images (applicable to batch and multiple editing)
  • toJSON returns the edited image in raw JSON data, suitable for editing back
  • toJSONs returns Array of raw JSON data of the images (applicable to batch and multiple editing)
  • download downloads the image(s) as file(s) (one by one) to user’s file system
  • downloadAll downloads image(s) as a ZIP archive to user’s file system

Templates

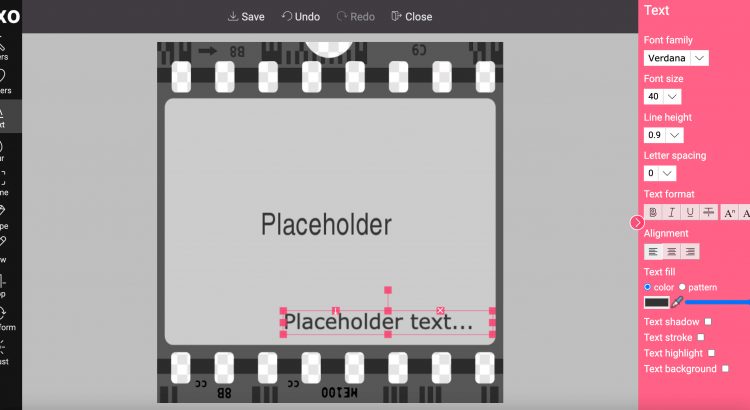
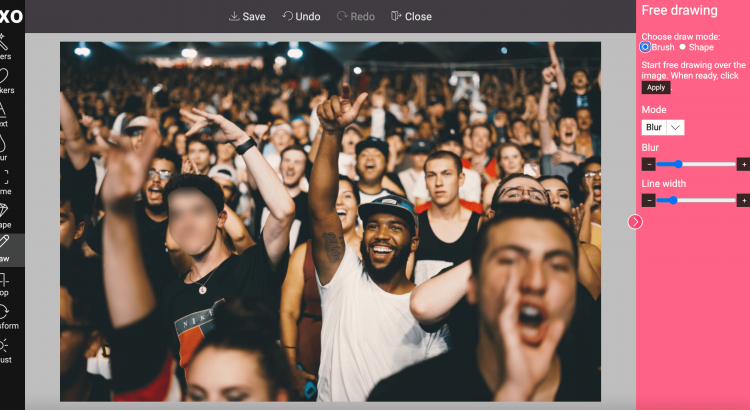
The toJSON export option gave us the ability to implement templating within Pixo Editor. Now Pixo can apply pre-defined templates to your end-users’ images. This includes anything that can be done with Pixo: text, filters, shape, frame, drawings, stickers… everything! When the end-user opens his image in Pixo, template is applied to it and every object (text, sticker, etc.) is editable.

Creating a template

To create a template, create a new Pixo Editor instance with onSave callback exporting the edited image as JSON:

const pixo = new Pixo.Bridge({
   apikey   : 'apikey',
   onSave   : function ( image ) {
      const template = image.toJSON();
      // save the template to your database so you can reuse later...
   },
});
pixo.edit('any/image');

image.toJSON() returns you a raw JSON data of the image, which you can store in your database as a template and reuse later.

Applying a template to end-users’ images

Then, on your production, for your end users, you can instantiate Pixo like this:

const pixo = new Pixo.Bridge({
   apikey   : 'apikey',
});
pixo.edit({
   src: 'uploaded-user-image-base64-or-url',
   template: template, // this is the template exported in the above example
});

This will apply all the changes from the template (text, stickers, frame, shape, color corrections, filters, etc.) to the users’ images.

Happy coding! Stay safe!

Blur brush in Free Drawing

Many of you’ve been asking us for this feature for so long, and we finally did it. Our Free Drawing tool now has a Blur brush, allowing end users to blur regions on their photos, such as faces and car plates. Check it in action:

The new feature is now available to all users.

Custom pre-defined crop sizes

You asked for it and we did it! We just released a new API that allows you to extend the default pre-defined crop sizes, or to completely replace them.

You can do that by passing a constructor callback option called filterCropSizes. This function accepts default crop sizes as array and must return the updated array or new array. Each item in the array must be an object with the following properties:

  • caption (String) Caption that will be displayed below the crop size
  • value (Number) Crop aspect ratio
<script>
var my_crop_sizes = [
  {
     // Crop size caption that will be printed in the property panel below the preview.
     // Required.
     caption: '3:2',

     // Crop aspect ratio.
     // Required.
     value: 3 / 2,
  },
  {
     caption: '5:3',
     value: 5 / 3,
  },
];

var pixo_instance = new Pixo.Bridge({
  apikey: 'abc123xyz000',
  filterCropSizes: function(default_crop_sizes){
     // replace default crop sizes with your own
     return my_crop_sizes;
     // or, merge them and place yours at the top
     return my_crop_sizes.concat(default_crop_sizes);
     // or, merge them and place your at the bottom
     return default_crop_sizes.concat(my_crop_sizes);
     // or, mix them randomly
     return default_crop_sizes.concat(my_crop_sizes).sort(function(){
        return Math.random() - 0.5;
     });
  },
});
</script>

You can later filter crop sizes by calling the appropriate instance method, like this:

pixo_instance.filterCropSizes(function(default_crop_sizes){
   // ...
   return my_crop_sizes;
});

Happy coding!

Christmas: 50% off on all subscriptions

It’s that fantastic time of the year! Therefore:

  1. we deployed a thematic stickers pack
  2. we give you a special -50% discount on all packages!

Stickers

They are available in all plans, so enjoy!

If you do not want them, you may consider filtering them by using our filterStickers API.

Christmas –50% OFF

When purchasing new plan you will get –50% discount on all packages*. Hurry up and get a subscription before Saturday, Jan 9 2021!

Merry Christmas, and a happy New year! Stay safe!

* Discount is applied only on the first subscription payment. Discount is not applied on recurring payments (subscription renewals).

2020’s updates to Pixo Image Editor

This year went crazy due to COVID-19 disease. Just like many other companies, we experienced and continue to experience hard times too. Still, we did not stop to deliver small but handy updates to the Image Editor, although we did not announce them here. But we will fix that – below you will find a digest of most important improvements we’ve released so far after Session Restore feature.

Crop improvement

Toggle crop lock ratio now affects crop rectangle controls:

Released: Nov 7

Improved Sticker’s organizing & filtering

The UI component for filtering stickers is now an autocomplete dropdown. If you are using our default stickers library this change won’t affect the user experience. But if you use your own collection, sticker keywords will appear as options in the dropdown menu, and will be filtered while the user is typing:

Released: Sep 26

Pick color from image

Users now can use the color picker pipette to pick a color anywhere from the image:

Released: Aug 17

More translations

Pixo is now available in Russian and Arabic. Just add language: "ar-SA" for Arabic or language: "ru-RU" for Russian in Pixo.Bridge constructor options. More on languages.

Released: Sep 29

Rotation points on all sides of selected object

This is useful when objects (stickers, text blocks, etc.) are larger than the image itself and the user wants to rotate them:

Released: Sep 28

Captions in custom frames

You can now add captions to your custom frames in the filterFrames callback.

Released: Sep 17

Free drawing: Insert shapes

Free drawing tool now supports insertion of basic shapes with solid or semi-transparent color:

Released: Aug 22

Mobile improvements

  • Mobile Edit menu now does not show the “More” button if there are excluded features and all buttons fit on the viewport width
  • Re-organized properties in Mobile Property panels

Released: Aug 27

Text tool: background color

While the existing Highlight was adding background around the text only and not the whole block, the Background color option now does it:

Released: Aug 19

2 new filters: Redify & Extra Sharp

Original
Sharp
Extra Sharp

Original
Redify

Released: Jun 11

Doubled server resources

This month we started to experience peaks of performance degradation in Pixo’s usage several times. This resulted in huge latency, even outages:

  • Nov 04 2020 07:50 AM UTC – 08:05 AM UTC (15 min)
  • Nov 12 2020 01:26 AM UTC – 02:21 AM UTC (55 min)
  • Nov 18 2020 02:49 AM UTC – 03:36 AM UTC (47 min)

This required us to act very fast. So we did. On Nov 19 2020 06:39 AM UTC our devops started the upgrade procedure. Server resources are now doubled. This, however, resulted in additional 25 minutes of downtime.

So far we observe no issues. Our devops continue to monitor all systems 24/7.

We apologize for the outages.