loading

Pixo Image Editor

Black Friday: 50% off on all subscriptions

There are two weeks till Black Friday and Thanksgiving. Therefore:

  1. we deployed a thematic stickers pack
  2. we give you a special -50% discount on all packages!

Stickers

They are available in all plans, so enjoy!

If you do not want them, you may consider filtering them by using our filterStickers API.

Black Friday -50% OFF

When purchasing new plan you will get -50% discount on all packages*. Hurry up and get a subscription before Friday, November 27!

Happy Thanksgiving! Be good! Stay safe!

* Discount is applied only on the first subscription payment. Discount is not applied on recurring payments (subscription renewals).

Pixo & Modula – The Perfect Combo for Photographers

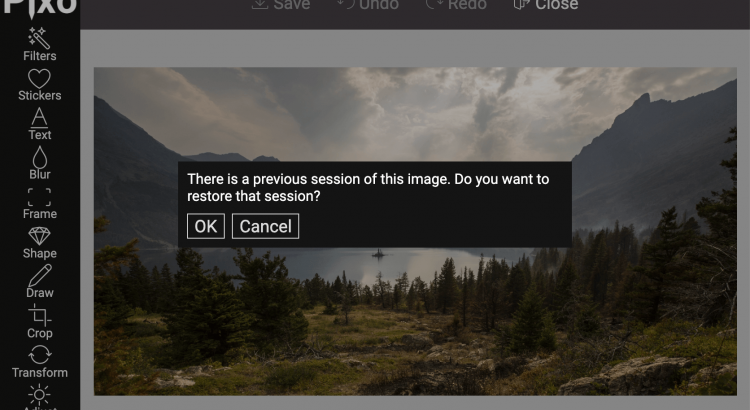
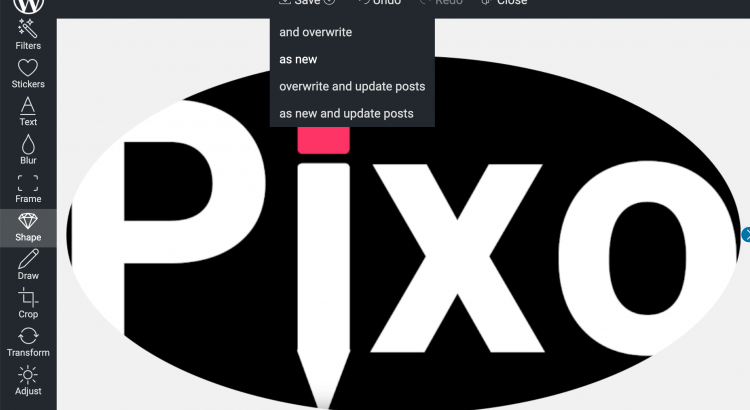
We’ve been on the WordPress market for quite some time, thanks to our plugin. Now every WordPress website or blog can use Pixo as default image editor in wp-admin. All Pixo features come pretty much in handy, especially batch & multiple editing. Thanks to this, you can retouch all your images pretty quickly, and prepare them for your portfolio. 

But how  to create an impressive portfolio to showcase your masterpieces? Well, we will tell you about WordPress’s best kept secret. We have heard that Modula is the most stunning portfolio builder that comes with a bunch of excellent features for photographers. The most important thing is that it is user-friendly and has an interface that’s easy for the eye. 

This gallery builder has two versions, Modula Lite, which is the free version, and Modula PRO, which has more features and a variety of options to choose from when it comes to pricing. Every pricing plan (Starter, Trio, Business, Agency) provides support and updates for one full year, unlimited images, and unlimited galleries.

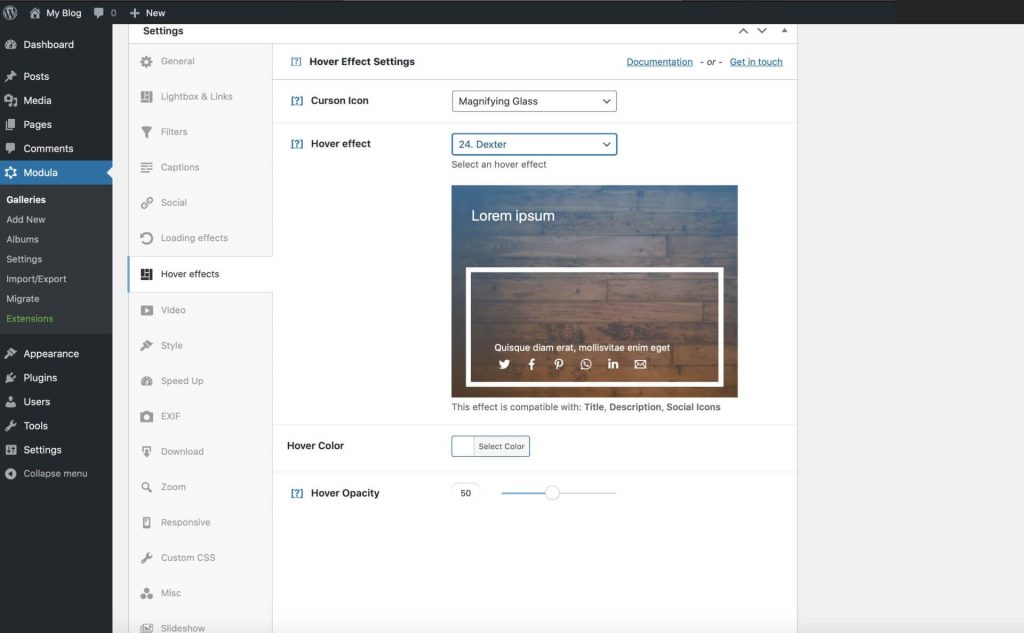
But what makes Modula so cool? First of all, you can organize your galleries into Albums, mix pictures with videos, and even integrate GIFs in your portfolio. Modula comes with stunning hover effects where you can add a title, short description, and social icons. Do you know what goes hand in hand with an impressive portfolio? Custom grids that will allow you to arrange your images according to your style. Also, Modula comes with straightforward lightbox integration powered by Fancybox that magnifies the way your pictures will be shown.  

Moreover, Modula provides incredible image-entry animations to make your portfolio more dynamic and attractive to visitors. Want some filters for your images? Well, Modula offers extraordinary filters too. And to get rid of all those images thieves, you can protect your galleries by adding a watermark and a password. If you want to reach the mountain top, and be #1 on the Google ranking, you can take advantage of the SEO add-on that Modula offers. Wonderful! 

There’s more! It doesn’t require any coding skills, and it is mobile responsive. You can easily create your galleries with just a few clicks. And it’s super fast thanks to the Speed Up extension that helps you upload images at the speed of light.

Let us show you how easy it is to install the Modula Image Gallery and create a stunning portfolio.

Download and activate Modula

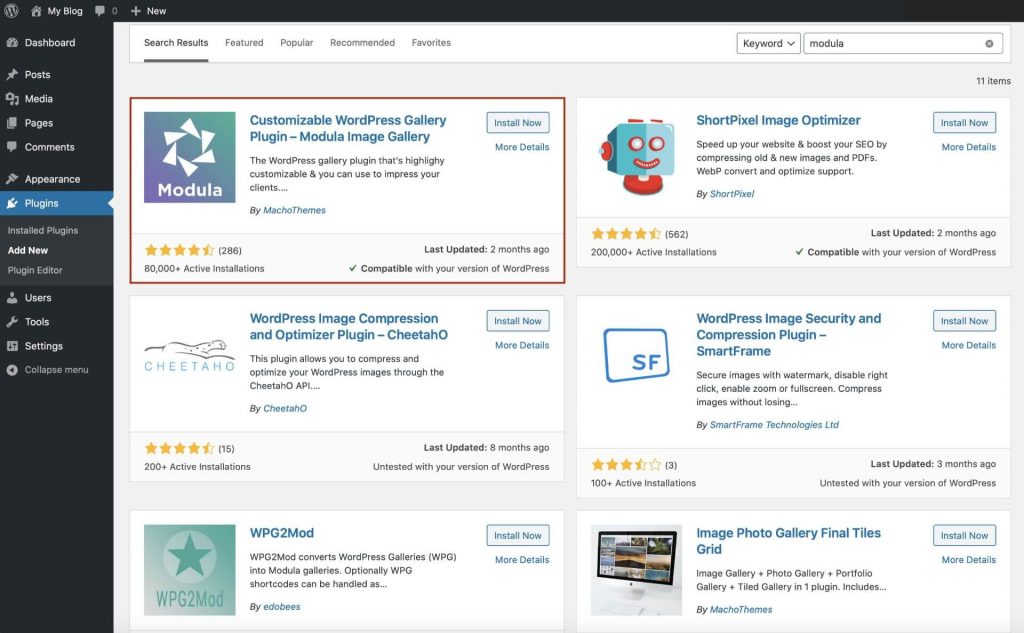
In the first place, go to the Plugins section in your WordPress dashboard, and press Add New. In the search bar in the right corner, you will have to look for Modula Image Gallery. Click on Install now and wait for a couple of seconds. It won’t take long, I promise! After loading, Activate the plugin.

Create your portfolio

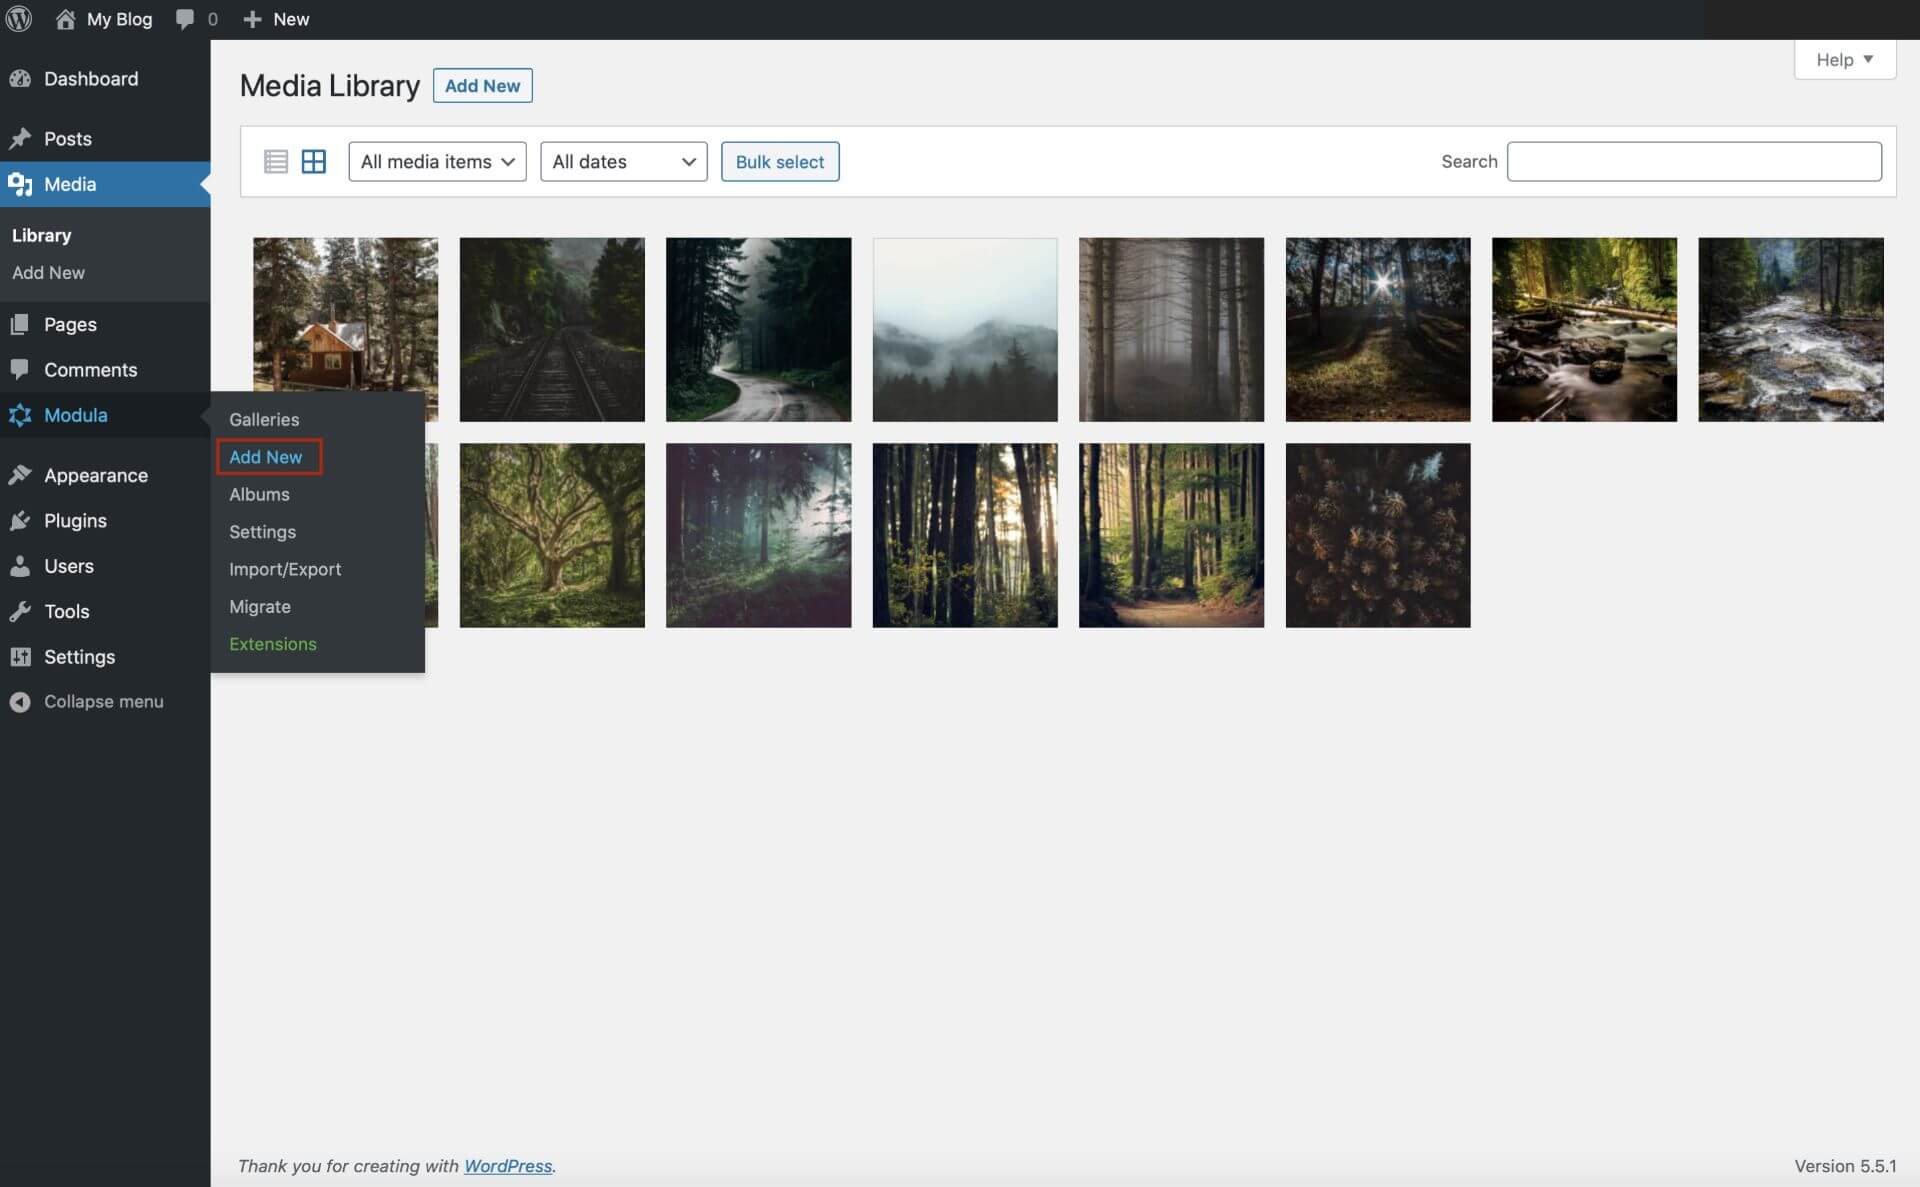
In your WordPress dashboard, you will see the Modula plugin. Go to the item and click on the Add New button. Now you can start creating your first portfolio and upload your images. If you still haven’t figured out how to arrange the photos, don’t worry! Everything here is customizable, and you can sort them according to your preferences.
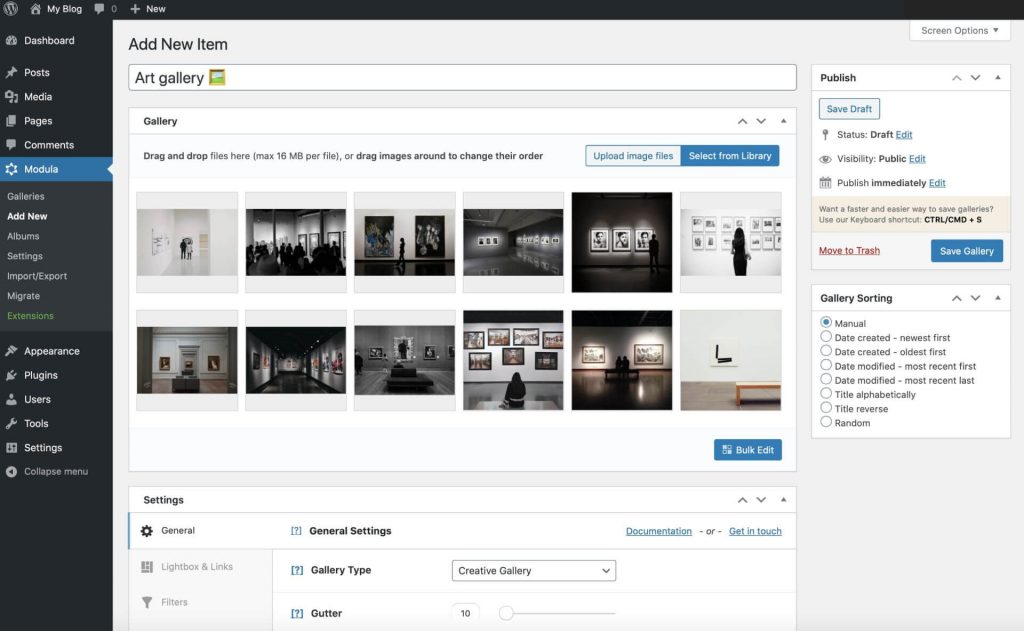
Name your portfolio

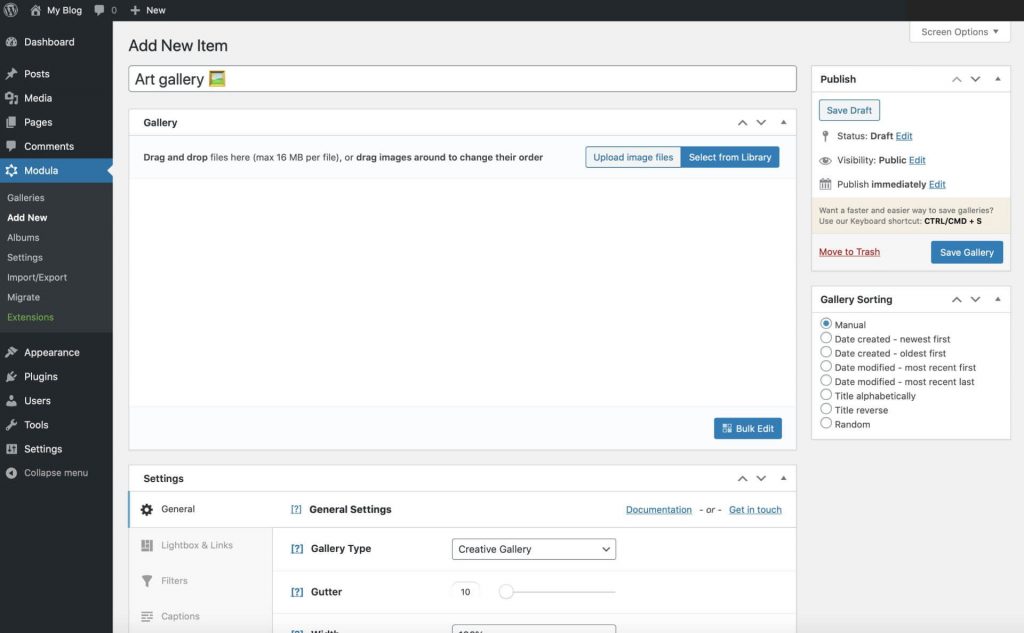
We advise you to use a descriptive name for your portfolio. This will help you distinguish between your galleries and help visitors understand what everything’s about. 

Upload images to your portfolio

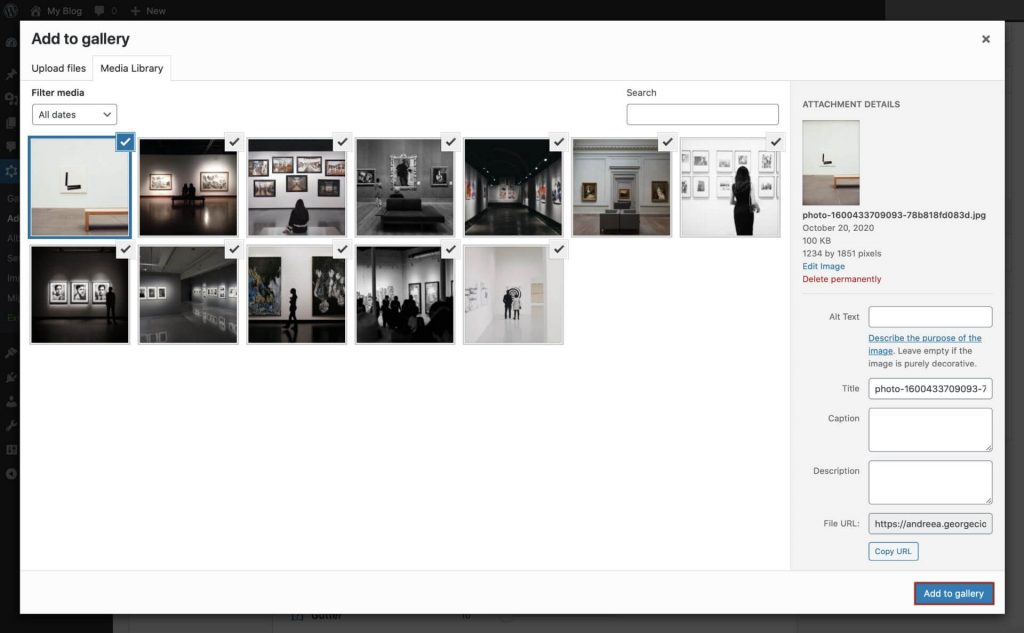
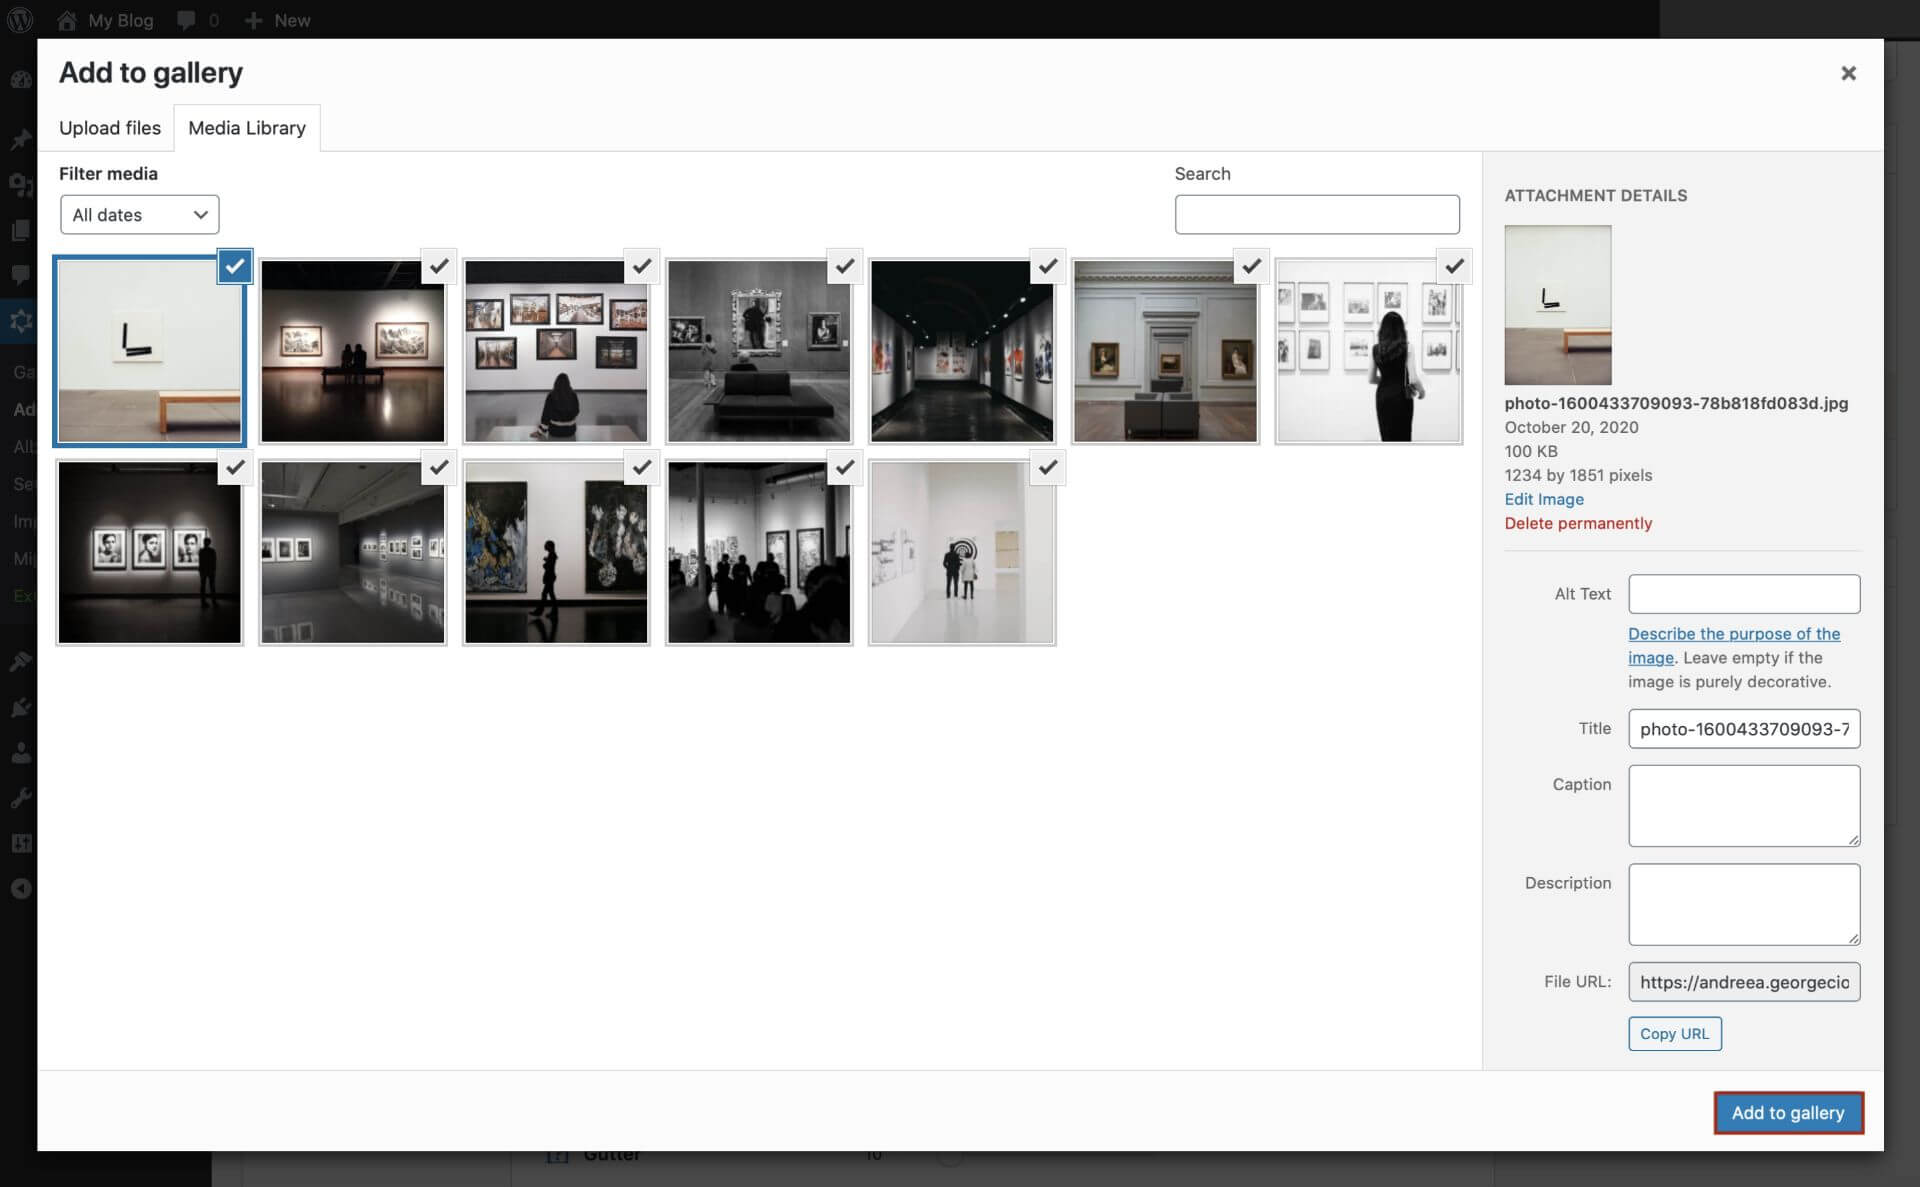
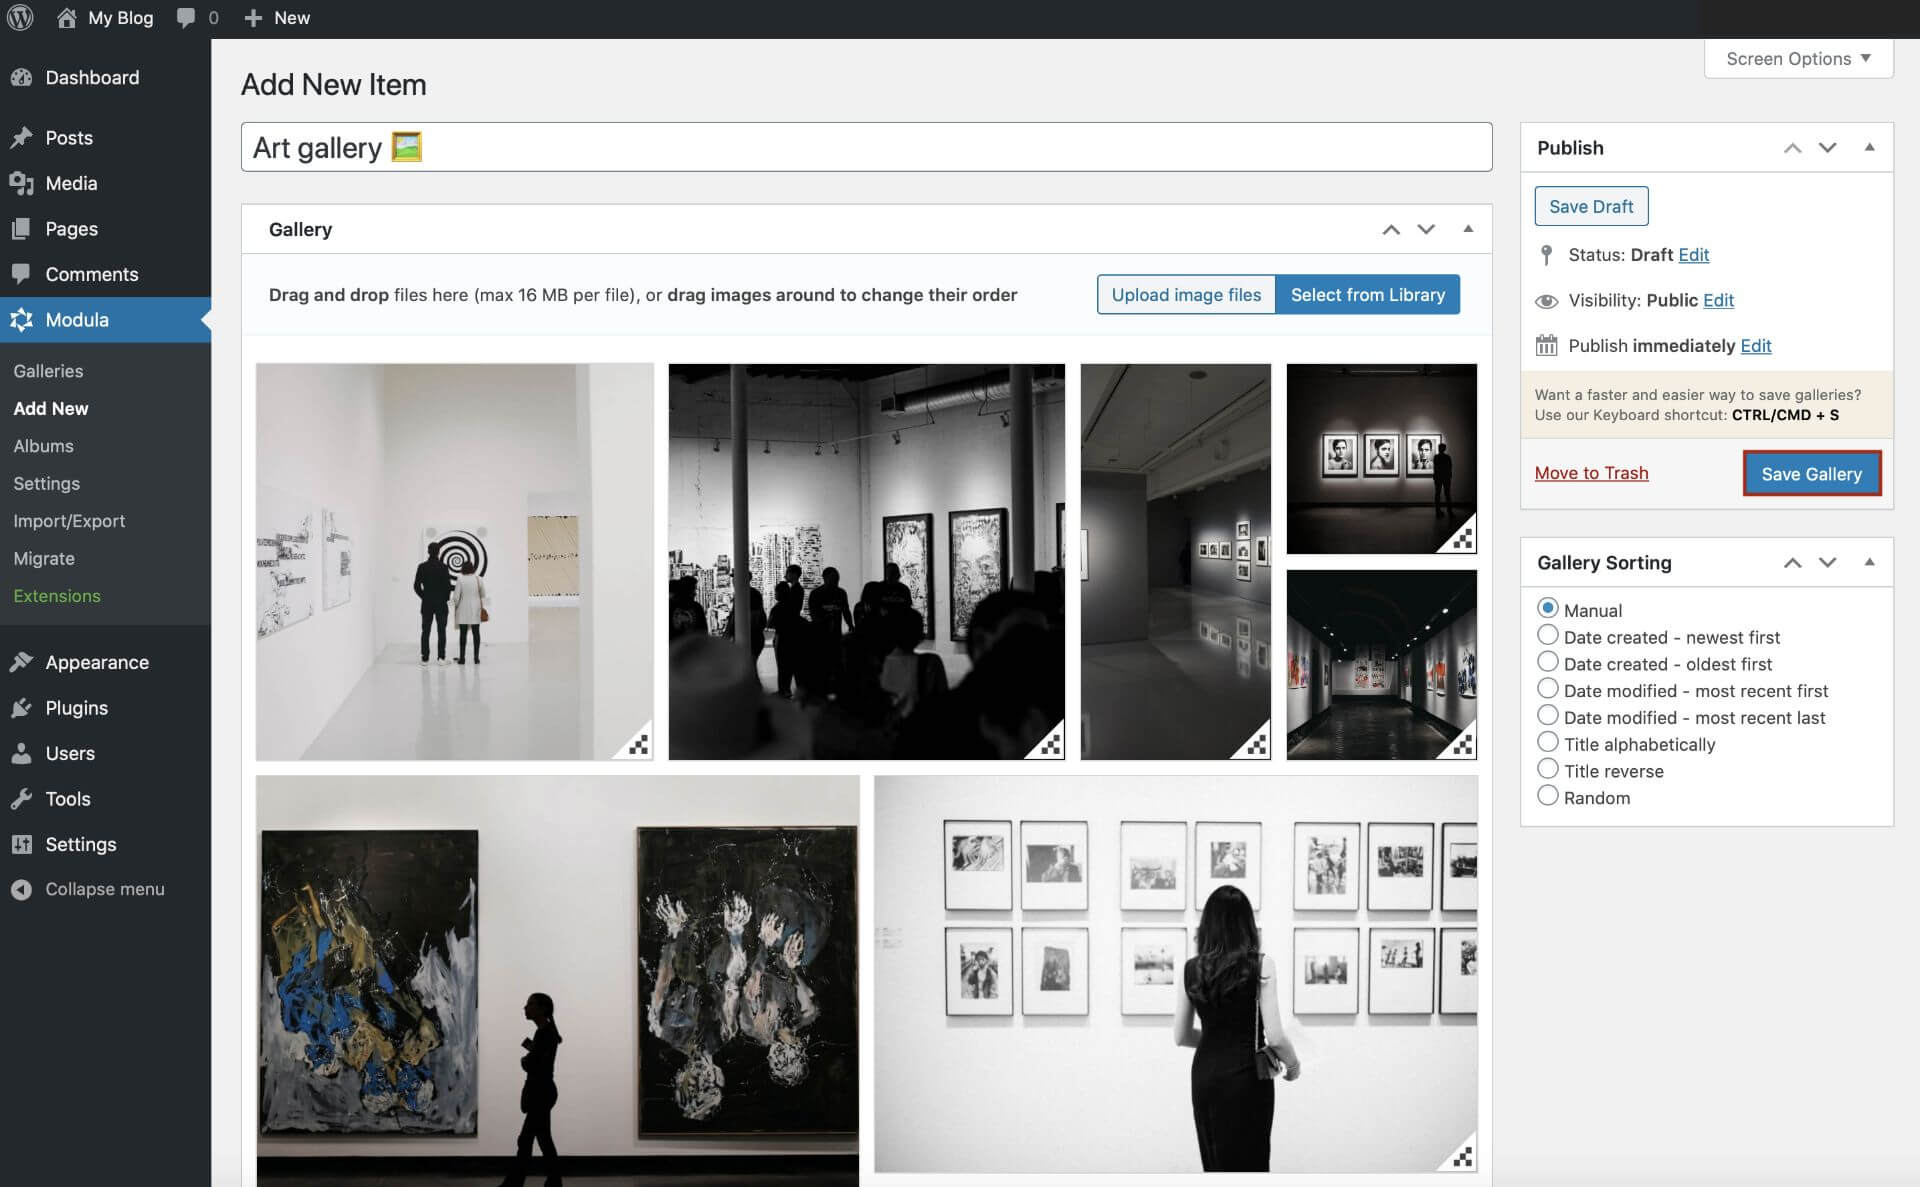
Once you have selected your images, you can upload them to your portfolio. Click on Add to gallery, and the pictures will appear in the gallery edit section as seen below:

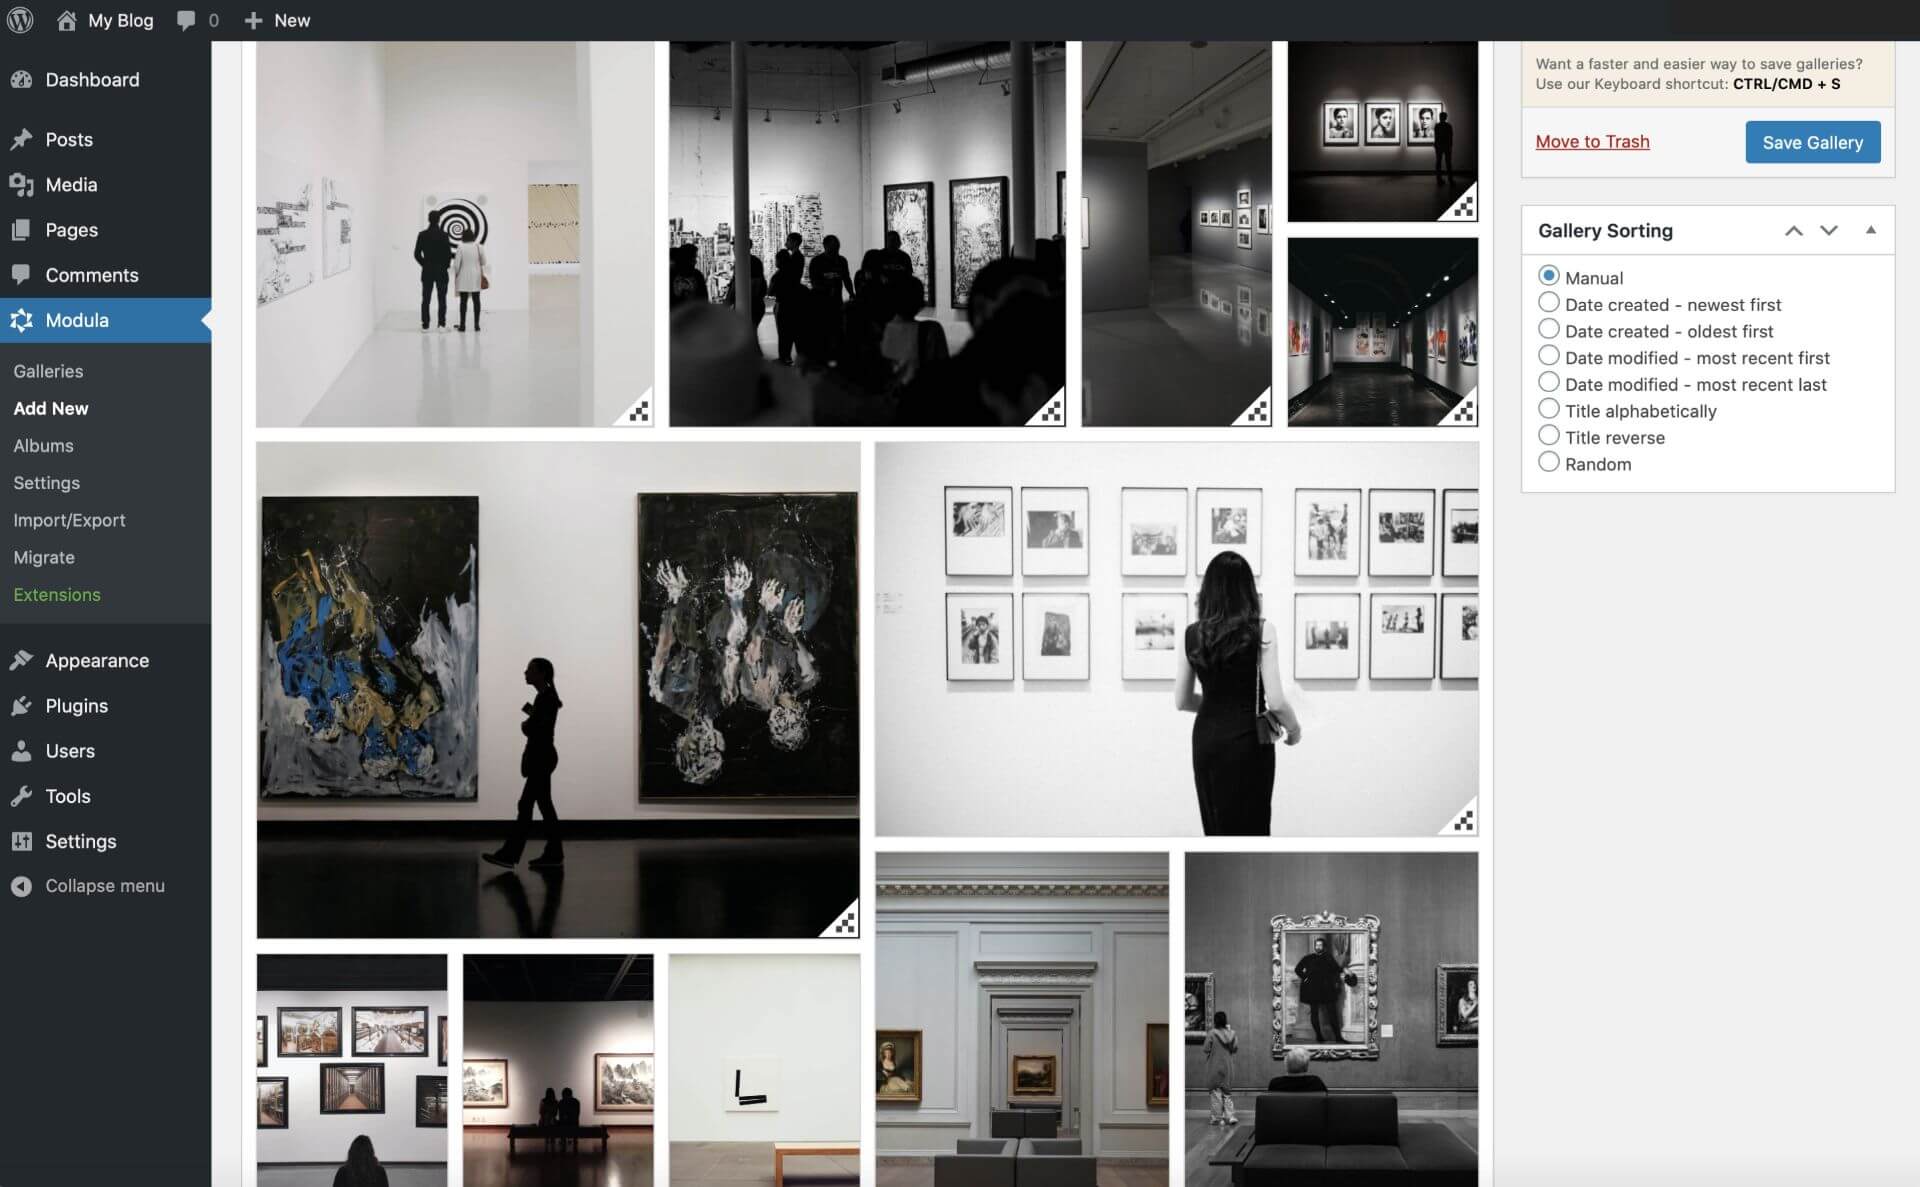
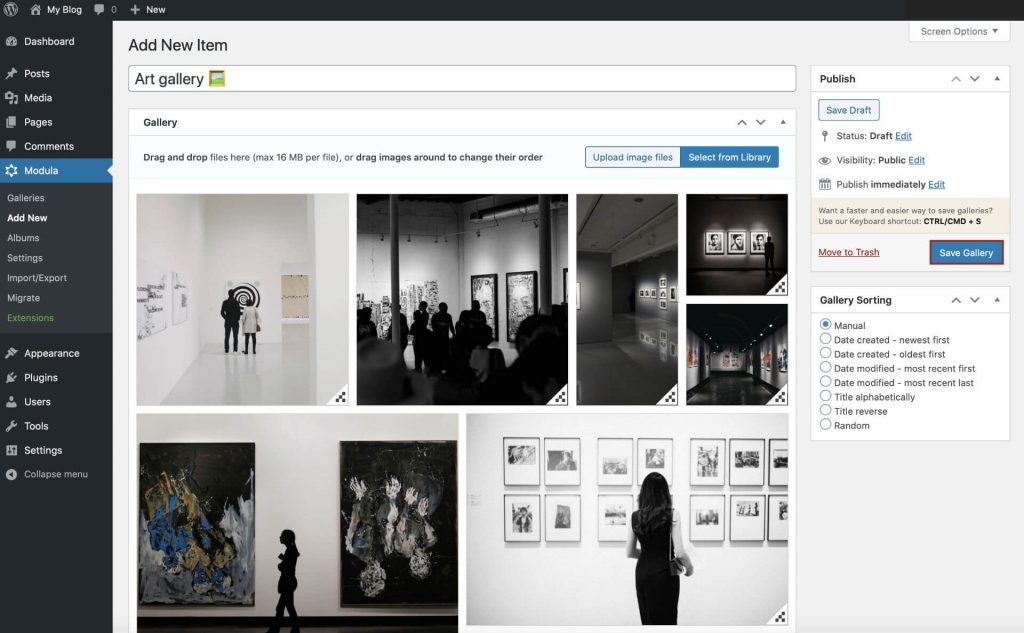
Next, you can easily drag and drop your photos and organize them in such a way to have the most stunning photography portfolio.

Publishing and inserting your portfolio

Now that you have some impressive images in your portfolio, don’t forget to press Save Gallery

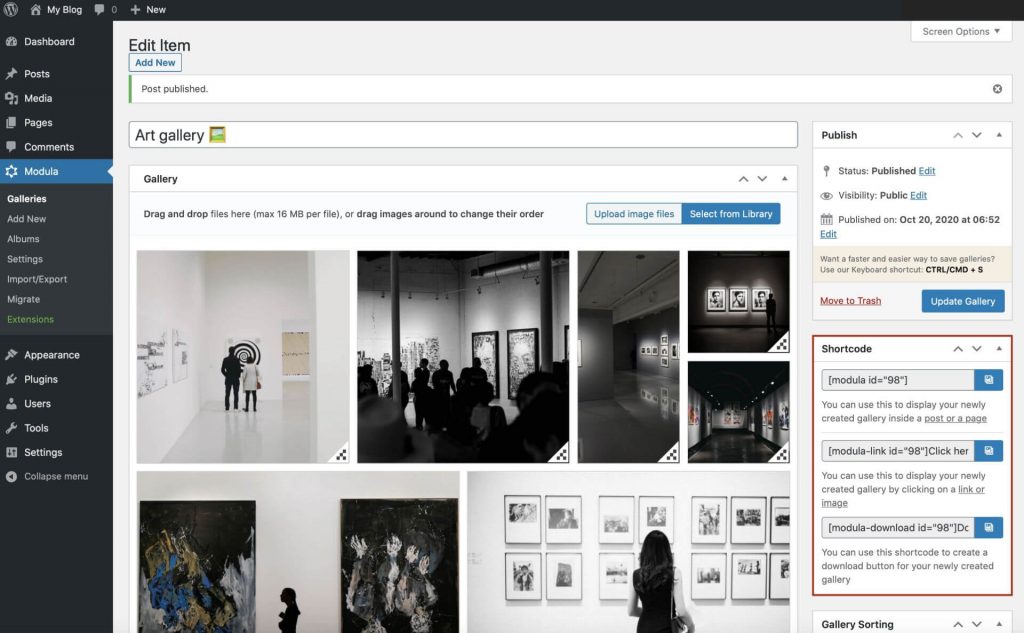
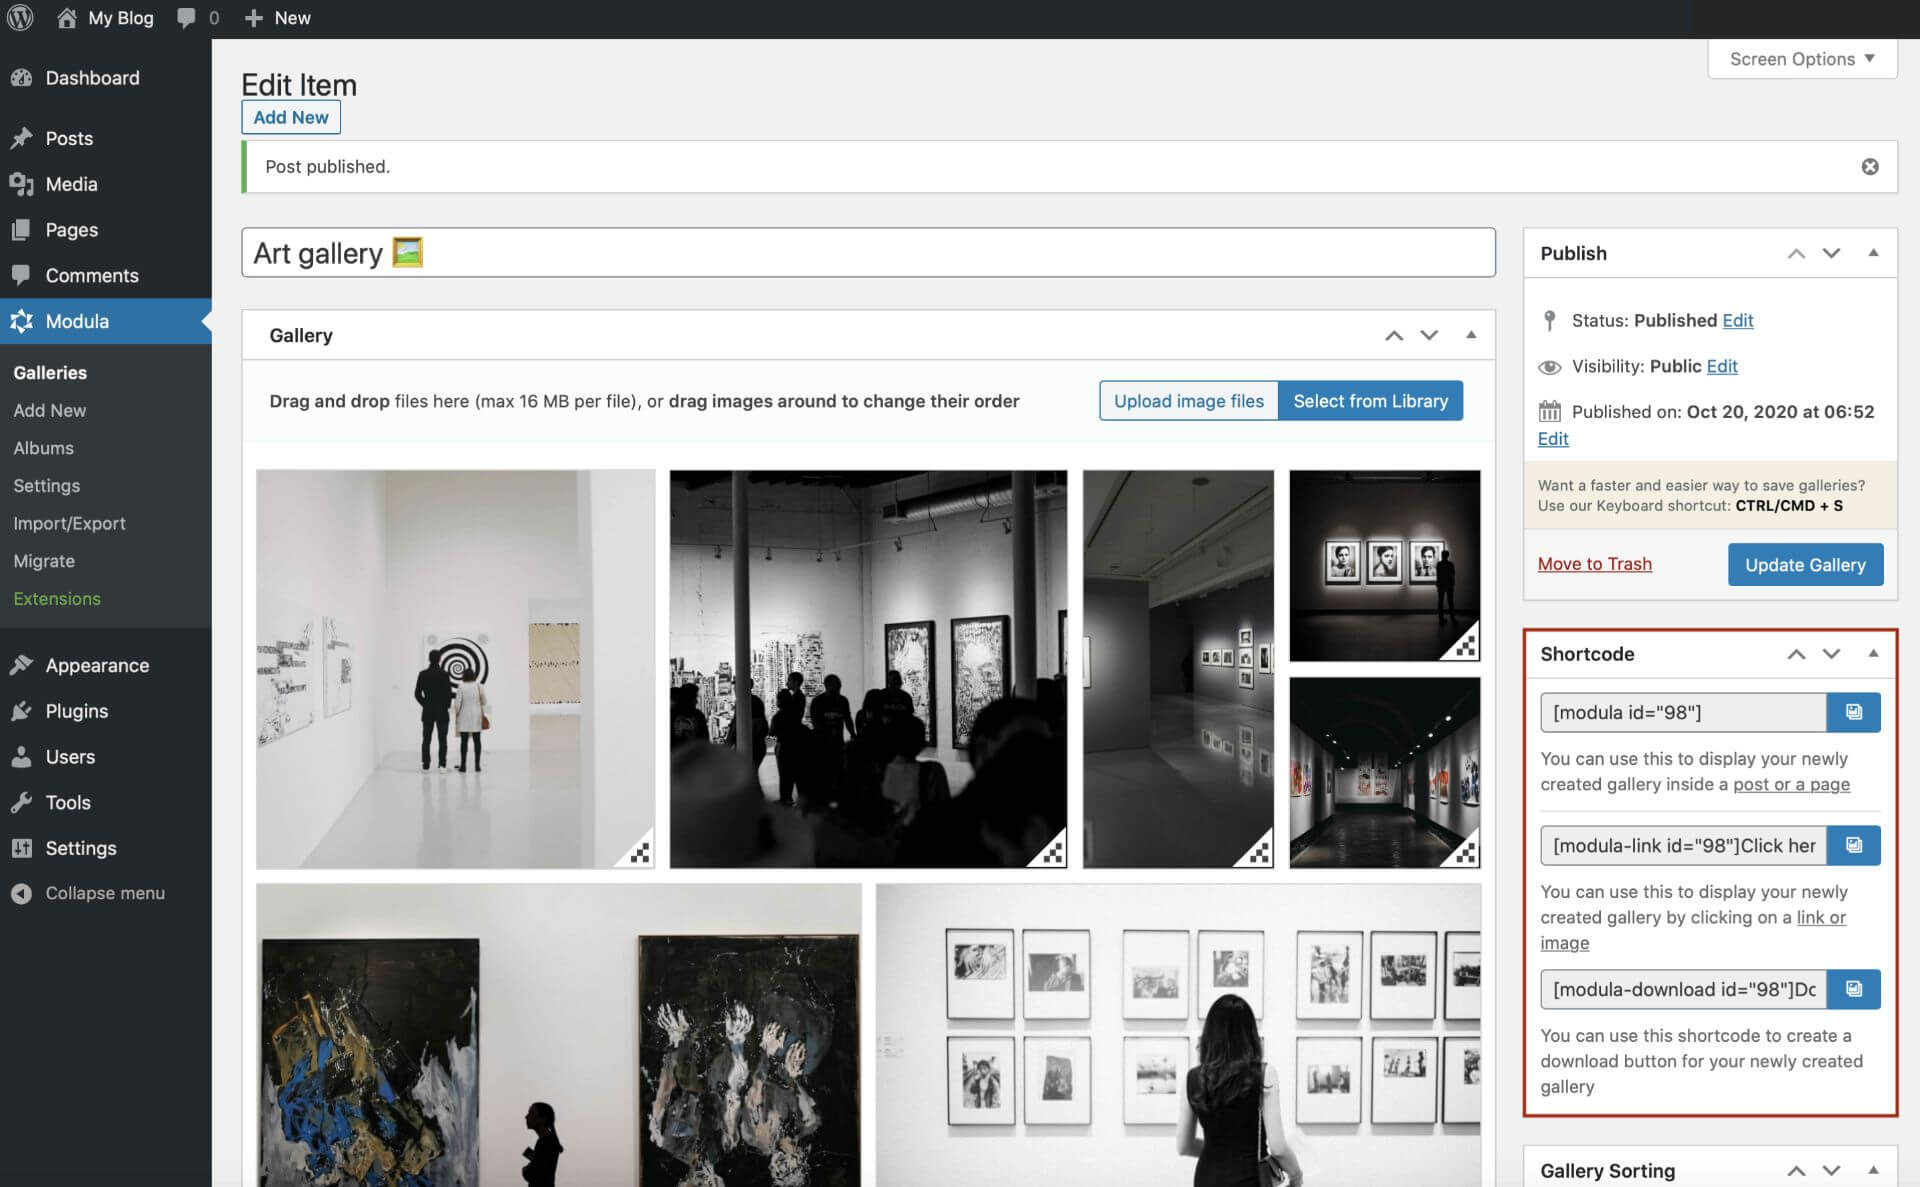
The shortcode and the copy link will be generated in the gallery edit area. You only have to copy the shortcode and paste it wherever you want to publish your portfolio. Easy as that! You can post the shortcode on a page or in a post as well.

Customize your portfolio!

Everything here is customizable. Be sure to take advantage of every feature, and you will see results coming in no time. With the Modula Gallery Image plugin, you can create the most professional portfolios, photo galleries, video galleries and build a strong photography community. 

Pixo and Modula – The perfect combo for photographers: Summary

So, how about this? Glamorize your pictures with Pixo Image Editor and enhance your portfolios with Modula Image Gallery. Once you take this path, no one can stop you. Get crazy with these two tools and show people how your imagination reaches the highest peaks. 

Session restore

Did you ever close the Pixo Editor by accident, and all your edits gone away? Or did you ever quickly hit Save and few seconds later wanted to undo a change, but loading the exported image simply started a new session? Well, we are happy to tell you that this is now over!

Few days ago we released a great feature of the editor – Session Restore. Pixo now automatically restores the previous session of an image, allowing you to get back in history (Undo), change settings, update text, remove existing stickers, anything. Just as if you didn’t quit your previous session. This works for both saved and unsaved images.

The great thing about Session Restore is the fact that it is fully configurable. You can define which session types to be restored (e.g. only saved images, or only unsaved) or remove it completely. Here are few examples:

new Pixo.Bridge({
   // This disables the Session Restore feature
   sessionrestore: false,
   // This disables the Session Restore feature for saved images only
   sessionrestore: {
      saved: false,
   },
   // This disables the Session Restore feature for unsaved
   // (closed without save) images only
   sessionrestore: {
      unsaved: false,
   },
   // This disables the default prompt for Session Restore
   // and restores the session immediately
   sessionrestore: {
      saved: { prompt: false },
      unsaved: { prompt: false },
   },
});

By default Pixo restores sessions for both saved and unsaved images, and prompts the user for that.

Configurable actions

We are happy to announce that the Actions Menu of the Editor (Save, Close, Undo/Redo) is now configurable. This can be done with the new actions configuration in Pixo.Bridge:

new Pixo.Bridge({
   ...,
   actions: [ ... ],
});

The default value can be seen as the Pixo.ACTIONS_MENU constant. It is array, containing 4 objects:

  1. Pixo.ACTIONS.SAVE_CLOSE
  2. Pixo.ACTIONS.UNDO
  3. Pixo.ACTIONS.REDO
  4. Pixo.ACTIONS.CLOSE

If, for example, you want to remove the Undo/Redo actions from the menu, you simply construct Pixo.Bridge with the following configuration:

new Pixo.Bridge({
   ...,
   actions: [ Pixo.ACTIONS.SAVE_CLOSE, Pixo.ACTIONS.CLOSE ],
});

You can, of course, provide your own actions, that will call back your application. An action is a JavaScript object with the following shape:

  • caption (String) human-readable caption
  • action (String) the system action to be executed in the editor
  • icon (String) name of the icon to be shown on the left of the action button (see linearicons.com for full list of icons and their names; pass here the name without the lnr- prefix)
  • onClick (Function) callback function that will be executed

An action can be a simple button, but also a dropdown of multiple sub-actions. To create a dropdown action, simply pass one more property to the above shape:

  • options (Array) list of objects with the following shape:
    • caption (String) human-readable caption
    • action (String) action ID

When the sub-action is clicked, it’s action is passed to the onClick callback as argument:

new Pixo.Bridge({
   actions: [
      // This will create a single button
      {
         caption     : 'Export', // You can set whatever caption you like
         icon        : 'download', // List of available icons: https://linearicons.com/free
         onClick     : function () {
            console.log('Export clicked!');
         },
      },
      // This will create a dropdown list of sub-actions
      {
         caption     : 'Save',
         options     : [
            {
               caption     : 'and overwrite',
               action      : 'SAVE_OVERWRITE', // Your custom action
            },
            {
               caption     : 'as new',
               action      : 'SAVE_NEW',
            },
         ],
         onClick     : function ( action ) {
            // In the `onClick` callback you receive the clicked action 
            if ( action === 'SAVE_NEW' ) {
               this.saveAndClose( function ( output ) {
                  document.body.appendChild( output.toImage() );
               });
            }
         },
      },
   ],
});

You can check our Documentation for more examples. You can also have a look at the source of the WordPress plugin that integrates Pixo, and see the custom actions in action.

Configurable actions are Premium feature and are available in all paid subscriptions, as well as in the free 30-day trial period.

Batch editing and multiple editing

Today we announce the release of Batch Editing API. You can now send a batch of images to Pixo Editor, the user edits the first image, and all changes are applied to the whole batch. Check the following video to see it in action:

What is it good for

When you want to apply the same operations to a batch of images. For example, if you have a gallery of 100 images, and you want to apply the same filter to all, batch operation would be perfect. Pixo’s Batch Editing is perfect for manipulations that do not affect or rely on image dimensions, such as:

  • apply Filter
  • add Frame
  • apply Shape
  • adjust Color Corrections
  • Transform

But it is also good enough for the rest of the manipulations:

  • adding Stickers
  • adding Text
  • Blur
  • Drawing
  • Crop

Even if images differ in dimensions and ratios, Pixo will take this into consideration and will smartly apply changes to the batch.

How does it work

All you need to do is to pass array of images to the edit() method, and replace one of the toImage(), toDataURL() or toBlob() with toImages(), toDataURLs() or toBlobs() in the onSave() callback, like this:

<script src="https://pixoeditor.com/editor/scripts/bridge.m.js"></script>
<script>
   new Pixo.Bridge({
      apikey: 'abc123xyz000',
      onSave: function(arg){
         //the passed `arg` has the following methods: toImages, toDataURLs, toBlobs
         //all returning array of images in the requested format 
         arg.toImages().forEach(img => document.body.appendChild(img));
      }
   }).edit([
      //user will edit only this image and all changes will be replicated to the rest
      'http://yourdomain.com/path/to/image1.jpg',
      'http://yourdomain.com/path/to/image2.jpg',
      'http://yourdomain.com/path/to/imageN.jpg',
   ]);
</script>

Check the video above for more detailed example, or refer to our documentation.

Availability

Batch editing is a Premium feature, and is available in all Premium packages, and of course in the 30-day free trial. FREE package does not support batch editing.

Charges

You will be charged as a single image for the whole batch. No matter how big the batch is – 2, 5, 10, 100 – saved images counter will be increased only by 1.

Multiple editing

Together with the Batch editing Pixo now supports Multiple editing. Before you were able to edit a single image per session. Now, you can pass multiple images to the edit method as arguments, and they will be edited one after another, in a single session. You are also able to combine multiple editing with batches:

<script src="https://pixoeditor.com/editor/scripts/bridge.m.js"></script>
<script>
   new Pixo.Bridge({
      apikey: 'abc123xyz000',
      onSave: function(arg1, arg2, arg3){
         document.body.appendChild(arg1.toImage());
         document.body.appendChild(arg2.toImage());
         document.body.appendChild(arg3.toImage());
         //or better
         [].slice.call(arguments).forEach(arg => document.body.appendChild(arg.toImage()));
      }
   }).edit(
      //user will edit every image one after another
      'http://yourdomain.com/path/to/image1.jpg',
      'http://yourdomain.com/path/to/image2.jpg',
      'http://yourdomain.com/path/to/imageN.jpg'
   );
</script>

Check the video above for more detailed example, or refer to our documentation.

Tutorial: Integrate Pixo in Vue app

This post is part from series of posts related to integrating Pixo into most popular frameworks. You may check also:

You can check the example and the source code here.

Create new Vue app

We start with creating a boilerplate app. We need Vue-CLI for that purpose, so make sure to install it if you don’t already have it:

npm install -g @vue/cli

Then create the new application:

vue create vue-pixo

This creates the required files structure, dependencies and tooling – everything you need to start developing your business logic.

Start the app

npm run serve

This will start dev server on localhost:8080 where you can see the welcome screen.

The browser will automatically reload every time you save a file.

Integrate Pixo

Now let’s get the real work done.

Add Pixo.Bridge dependency

Open in your editor public/index.html and add <script src="https://pixoeditor.com/editor/scripts/bridge.m.js"></script> somewhere between the <head></head> tags.

This will add Pixo.Bridge to your global object (window). The Bridge class is required in order to create a “bridge” between your app and Pixo Service.

Create Pixo Bridge

Next step is to create new instance of Pixo.Bridge in your app component.

Create a new file src/components/PixoImage.vue and add the following code:

<template>
  <img v-bind:src="src" v-on:click="edit" />
</template>

<script>
const { Pixo } = window;

export default {
  name: 'PixoImage',
  props: {
    src: String,
  },
  methods: {
    edit() {
      new Pixo.Bridge({
         type: 'modal',
         apikey: 'xxxxxxxxxxxx', // put your API key here!
         onSave: img => this.$emit('edited', img.toDataURL()),
      }).edit(this.$props.src);
    }
  }
}
</script>

Now let’s see what’s happening:

  1. We need to declare a <template /> for our component; this template renders an Image with a src attribute bound to the data model and a click handler bound to a method
  2. Pixo is a global object (also property of the window object) created in the previous step; we need it in order to instantiate the Bridge
  3.  We export new reusable Vue component that will render an image and also integrates Pixo as editor; it expects the src of the image as a property
  4. The component provides an edit() method that is bound in the template; when the image is clicked, this method is invoked and it will create the new Pixo.Bridge instance, providing the image’s src to edit, and an onSave callback that emits 'edited' event; this is a custom Vue event and will notify the parent component that the image was edited in Pixo

Don’t forget to replace the dummy string with your real API key.

Use the new component in our app

Finally we need to update our app component to use our freshly created Pixo component for displaying images and adding editing functionality.

Open src/App.vue and replace the existing content with the following:

<template>
  <div id="app">
    <h1>Click the image to edit it</h1>
    <PixoImage v-bind:src="src" @edited="updateSrc" />
  </div>
</template>

<script>
import PixoImage from './components/PixoImage.vue'

export default {
  name: 'App',
  components: {
    PixoImage
  },
  data: () => ({
    src: 'https://via.placeholder.com/350x150',
  }),
  methods: {
    updateSrc(src) {
      this.src = src;
    }
  }
}
</script>

Check the browser and voila! The image is shown, and click on it loads Pixo! Now let’s break down what’s happening above:

  1. Our App provides a <template /> that renders the <PixoImage /> component, providing it with a src from App’s data model, and handling the @edited event with the updateSrc() handler
  2. <PixoImage /> component renders with the given src
  3. When image is edited and saved, updateSrc() handler takes care to update the src in App’s data model, which is also propagated to the <PixoImage /> component and it re-renders

That’s it! Simple as pie!

Source code and demo

Integration of Pixo in Vue app

You can extend & configure Pixo with anything you want, just make sure that you read our documentation.

This post is part from series of posts related to integrating Pixo into most popular frameworks. You may check also:

Tutorial: Integrate Pixo in React app

This post is part from series of posts related to integrating Pixo into most popular frameworks. You may check also:

You can check the example and the source code here.

Create new React app

We start with creating a boilerplate app. We need Create-React-App-CLI for that purpose, so make sure to install it if you don’t already have it:

npm install -g create-react-app

Then create the new application:

create-react-app react-pixo

This creates the required files structure, dependencies and tooling – everything you need to start developing your business logic.

Start the app

npm start

This will start Webpack dev server on localhost:3000 where you can see the welcome screen.

The browser will automatically reload every time you save a file.

Integrate Pixo

Now let’s get the real work done.

Add Pixo.Bridge dependency

Open in your editor public/index.html and add <script src="https://pixoeditor.com/editor/scripts/bridge.m.js"></script> somewhere between the <head></head> tags.

This will add Pixo.Bridge to your global object (window). The Bridge class is required in order to create a “bridge” between your app and Pixo Service.

Create Pixo Bridge

Next step is to create new instance of Pixo.Bridge in your app component.

Create a new file src/image.js and add the following code:

import React from 'react';

const { Pixo } = window;

export const PixoImage = ({ src, onChange }) => {
  const pixo = new Pixo.Bridge({
    type: 'modal',
    apikey: 'xxxxxxxxxxxx', // put your API key here!
    onSave: img => onChange(img.toDataURL()),
  });
  return <img src={src} onClick={() => pixo.edit(src)} />;
}

Now let’s see what’s happening:

  1. We need to import React in order for the transpiled code to work properly
  2. Pixo is a global object (also property of the window object) created in the previous step; we need it in order to instantiate the Bridge
  3.  We export new reusable React component that will render an image and also integrates Pixo as editor; it expects 2 props:
    • src Source URL of the image
    • onChange callback function that will receive the URL of the edited image, exported by Pixo
  4. The above component renders an image with the given URL and also adds onClick handler that opens the image for editing in Pixo Editor

Don’t forget to replace the dummy string with your real API key.

Use the new component in our app

Finally we need to update our app component to use our freshly created Pixo component for displaying images and adding editign functionality to them.

Open src/index.js and replace the existing content with the following:

import React, { useState } from 'react';
import { render } from 'react-dom';

import { PixoImage } from './image';

const App = () => {
  const [src, onChange] = useState('https://via.placeholder.com/350x150');
  return (
    <>
      <h1>Click image to edit</h1>
      <PixoImage src={src} onChange={onChange} />
    </>
  );
};

render(<App />, document.getElementById('root'));

Check the browser and voila! The image is shown, and click on it loads Pixo! Now let’s break down what’s happening above:

  1. Our App is a functional component using the useState React hook
  2. We keep the image src url in the app state and provide it to the PixoImage component
  3. We also provide the onChange callback to the component, so when Pixo exports the saved images our src gets updated

That’s it! Simple as pie!

Source code and demo

Integration of Pixo in React app

You can extend & configure Pixo with anything you want, just make sure that you read our documentation.

This post is part from series of posts related to integrating Pixo into most popular frameworks. You may check also:

Tutorial: Integrate Pixo in Angular app

This post is part from series of posts related to integrating Pixo into most popular frameworks. You may check also:

You can check the example and the source code here.

Create new Angular app

We start with creating a boilerplate app. We need Angular-CLI for that purpose, so make sure to install it if you don’t already have it:

npm install -g @angular/cli

Then create the new application:

ng new

This creates the required files structure, dependencies and tooling – everything you need to start developing your business logic.

Start the app

npm start

This will start Angular dev server on localhost:4200 where you can see the welcome screen.

The browser will automatically reload every time you save a file.

Integrate Pixo

Now let’s get the real work done.

Add Pixo.Bridge dependency

Open in your editor src/index.html and add <script src="https://pixoeditor.com/editor/scripts/bridge.m.js"></script> somewhere between the <head></head> tags.

This will add Pixo.Bridge to your global object (window). The Bridge class is required in order to create a “bridge” between your app and Pixo Service.

Declare Pixo as a global object

Since Pixo dependency is not modular, Pixo is registered as a global object. Angular is using TypeScript, therefore you will have to explicitly declare that Pixo is a global variable of type any. To do that:

  • create new file src/globals.d.ts
  • add declare var Pixo: any; and save it

Create Pixo Bridge

Next step is to create new instance of Pixo.Bridge in your app component.

Open src/app/app.component.ts in your editor and add the following properties and methods to the AppComponent class:

  • src: string url to initial image
  • onEdit: callback function to handle opening of Pixo Editor

The contents of src/app/app.component.ts should look like as follows:

import { Component } from '@angular/core';

@Component({
  selector: 'app-root',
  templateUrl: './app.component.html',
  styleUrls: ['./app.component.css']
})
export class AppComponent {
  title = 'angular-pixo';

  src: string = 'https://via.placeholder.com/350x150';

  onEdit(): void {
    var editor = new window.Pixo.Bridge({
      apikey: 'xxxxxxxxxxxx', // put your API key here!
      type: 'modal',
    });
    editor.edit(this.src);
  }
}

Don’t forget to replace the dummy string with your real API key.

Create the view

Next we need to update component view to display our image with the proper src from the model.

Open src/app/app.component.html and type:

<h1>Click the image to edit it</h1>
<img id="myimage" src="{{src}}" (click)="onEdit()" />

Check the browser and voila! The image is shown, and click on it loads Pixo! Now let’s proceed with the final step – handle the Save action.

Handle the Save

We need to add the onSave callback to Pixo.Bridge (instantiated previously in src/app/app.component.ts) that will update the model with the new src. Since this is asynchronous action, we are going to use NgZone. Include it from @angular/core together with the Component:

import { Component, NgZone } from '@angular/core';

Next, declare the AppComponent constructor:

constructor(private ngZone: NgZone) {
}

Finally, add the onSave callback that takes the edited image and stores it in the model:

onSave: arg => {
  this.ngZone.run(() => {
    this.src = arg.toDataURL()
  });
}

And that’s it! The image now updates in the new once it is edited with Pixo. And here is the final version of src/app/app.component.ts:

import { Component, NgZone } from '@angular/core';

@Component({
  selector: 'app-root',
  templateUrl: './app.component.html',
  styleUrls: ['./app.component.css']
})
export class AppComponent {
  title = 'angular-pixo';

  src: string = 'https://via.placeholder.com/350x150';

  constructor(private ngZone: NgZone) {
  }

  onEdit(): void {
    var editor = new window.Pixo.Bridge({
      apikey: 'xxxxxxxxxxxx', // put your API key here!
      type: 'modal',
      onSave: arg => {
        this.ngZone.run(() => {
          this.src = arg.toDataURL()
        });
      }
    });
    editor.edit(this.src);
  }
}

Source code and demo

Integration of Pixo in Angular app

You can extend & configure Pixo with anything you want, just make sure that you read our documentation.

This post is part from series of posts related to integrating Pixo into most popular frameworks. You may check also:

Pixo is now available in Russian!

Hi folks,

Here’s another translation available! It is Russian (ru-RU). If you need Pixo translated to this language, set it like this:

new Pixo.Bridge({
   language: 'ru-RU',
});

Special thanks to Evgeny Glazyrin, web programmer from Yoshkar-Ola, for translating.

If you want Pixo translated in your language, you can help!

Make Pixo on your web/hybrid app look native with iOS and Android themes!

We are happy to finally announce the release of Pixo Themes, which are available from quite some time (as beta). These are pre-defined colors & styles which you can include with just a single line in your Pixo instances. Take a quick preview:

“Default”
“Light”
“Dark”
“WordPress”
“iOS” (premium)
“Android” (premium)

Together with the Default theme (the one that you are familiar pretty well with) there are also lighter and darker versions (Light and Dark).

There is a WordPress-style theme, suitable if you integrate Pixo in a WordPress site (BTW you may also check the Pixo WordPress plugin).

And yes, there are the iOS and Android themes, which make Pixo look more like native app!

How to use them

new Pixo.Bridge({
   theme: 'iOS', // Can be anything from the above, e.g. "WordPress", "Light", "Dark", "Android" 
});

iOS and Android are Premium themes and are not available in the FREE package.